In the upcoming workshops, we will delve into learning the Max programming language. It provides a user-friendly and playful environment, making it accessible for users. For a 30-day trial, you can visit the following link (if you later purchase a license, you can seamlessly input your license number for full functionality). Max allows you to control various types of data and perform digital signal processing to manipulate sounds. It offers numerous features that significantly simplify your work—just by typing a few commands and dragging and drawing, you can construct complex systems. Today, our goal is to create a simple additive synthesizer patch.
https://cycling74.com/downloads
A Brief History of Max
Cycling ’74, acquired by Ableton in 2017, is the company that sells Max. Originally named Max/MSP, the title suggests two components: Max and MSP. Max primarily handled data control, such as MIDI, while MSP focused on signal processing. In 2008, the software was rebranded simply as ‘Max,’ encompassing both Max and MSP, along with Jitter—a tool for real-time manipulation of 3D graphics and video.
The foundation of Max is the ‘JUCE’ framework, an industry-standard audio C++ API available across various operating systems. If you’re familiar with Ableton Live, you might have come across Max for Live. As the name suggests, it’s the Max version tailored for Ableton Live, a logical development since Cycling ’74 became a part of Ableton through acquisition.
The First Patch: Always ‘Hello, World!’
In Max, each file is referred to as a patch, and a patch is akin to software that runs through Max. You have the option to export your patch as standalone software in case someone else needs to use it but doesn’t have Max on their laptop. If you have any programming experience, you’ll know that the first step in developing software often involves printing ‘hello, world!’—we’ll do the same here. First, let’s learn a few shortcuts:
b: Creates a bang button.
m: Creates a message.
n: Creates an object.
[Command] + [left-click]: Switches between edit and view modes.[1]
[Command] + [Shift] + m: Opens the Max Console.
The above is what you see when you open a new file. Anywhere in this window, press ‘b,’ and you will create a bang button below. A bang button sends out a “bang” message. In our usage, a “bang” message can trigger a message box, which you will generate next.

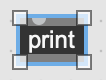
After creating a bang button, press ‘m‘ a little below the bang button you just created. It will display a box, and you can type whatever text you want. For now, please type in ‘Hello, World!’:

Press ‘n,’ and you will create an object. It is similar to the message box, but the shape of the box is different. Please type in ‘print’ like this:
If you have successfully created all three elements mentioned above, the next step is to connect them. Upon close inspection, you’ll notice each of these elements has a small half-circle shape on the top and/or bottom sides. Some have one or two, while others have none. These are referred to as inlets and outlets, and you can easily establish connections by dragging between inlets and outlets.
The objects we created have message inlets and outlets. We will explore signal inlets and outlets later; however, it’s important to note that message and signal inlets/outlets cannot be connected—they simply cannot. If you attempt to do so, Max will not allow it and will prevent you from making the connection. We’ll delve into this topic further in subsequent discussions.
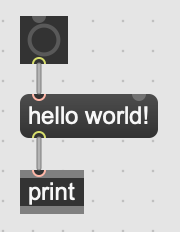
The above should be something similar to what you have. Now, click [Command] + [left-click] on any free space in the window. You will notice that some menus around the window are disabled. Before your click, you were in ‘edit’ mode. Now, you are in ‘view’ mode, where you cannot edit your patch but can run it. Click the bang button. You may not notice anything, but you have already triggered the patch you created. Press [Command] + [Shift] + m and see what information you get from the Max console:
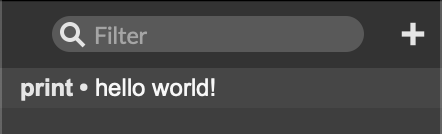
What occurred was that when you clicked the bang button, a “bang” message was sent to the ‘Hello, World!’ message box. Upon receiving the “bang” message, the message box forwarded its value—’Hello, World!’ in our case—to the print object. The print object displays the data it receives from the inlet on the Max console. So, congratulations! You have now completed your first Max patch!
[1] Just for your information, the Command key in macOS is equivalent to the Ctrl key in Windows. Throughout this tutorial, I will adhere to the macOS convention.
Reply